When you resize a geometric figure on a graph, knowing how much it grows is only half the problem. You also need to know exactly where it grows from. Finding the center of dilation from coordinates tells you the fixed anchor point of a geometric transformation. Without this point, a scaled shape could end up anywhere on the coordinate plane. This concept is foundational for everything from basic geometry homework to computer graphics and architectural modeling.
What exactly is a center of dilation?
The center of dilation is the fixed point from which every point of a pre-image is stretched or shrunk to create a new image. If you picture a flashlight projecting an image onto a wall, the bulb is the center of dilation. On a coordinate plane, this point can be the origin (0,0), but it can also be any other specific coordinate. When you are working with fractional scale factors, finding this exact center becomes especially important because the shape shrinks toward it rather than expanding away.
How do you find the center of dilation graphically?
The most straightforward way to find the center of dilation from coordinates is to draw it out on graph paper. You just need the coordinates of the original shape (the pre-image) and the resized shape (the image).
- Plot the vertices of the pre-image and the corresponding vertices of the image.
- Draw a straight line connecting the first vertex of the pre-image to the first vertex of the image.
- Repeat this process for the second pair of corresponding vertices.
- Identify where the two lines intersect. That intersection coordinate is your center of dilation.
For a standard triangle or rectangle, drawing lines through two pairs of vertices is enough. You can use a third pair to double-check your accuracy.
Can you calculate the center of dilation using an algebraic formula?
Yes, you do not always need to draw a graph. If you know the coordinates of a point on the pre-image, its corresponding point on the image, and the scale factor, you can use a specific formula. If you need more practice locating the center of dilation algebraically, setting up this equation is the most direct route.
The formula for the x-coordinate of the center (Cx) is:
Cx = (x2 - k x1) / (1 - k)
Here, x1 is the pre-image coordinate, x2 is the image coordinate, and k is the scale factor. You use the exact same formula for the y-coordinate, swapping x for y.
Let us look at an example. Suppose a point A at (2, 2) is dilated to A' at (4, 4) with a scale factor of k = 2.
- Cx = (4 - 2 2) / (1 - 2)
- Cx = (4 - 4) / -1
- Cx = 0 / -1 = 0
Doing the same for the y-coordinates gives you Cy = 0. The center of dilation is the origin, (0,0). For more detailed visual breakdowns of this concept, the Math is Fun geometry section provides excellent interactive graphing tools.
What happens if the scale factor is negative?
A negative scale factor changes how the image is positioned, but the method for finding the center remains exactly the same. Understanding how a negative scale factor affects geometric orientation helps you realize the image will simply reflect across the center point. The lines you draw connecting corresponding vertices will still intersect at the center of dilation, but the pre-image and image will sit on opposite sides of that center.
What are the most common mistakes to avoid?
When solving these problems, a few simple errors can throw off your entire answer.
- Mixing up coordinates: It is easy to accidentally plug the image coordinates into the pre-image spot in your formula. Always label your points clearly before calculating.
- Assuming the center is always the origin: While (0,0) is a common center of dilation in textbook problems, real geometry questions often hide the center at random coordinates like (3, -1).
- Drawing sloppy lines: If you use the graphical method, use a ruler. A line that is slightly off-angle will intersect at the wrong coordinate.
Next steps for mastering dilations
Before moving on to more complex geometric transformations, run through this quick checklist to ensure you understand the process:
- Identify your pre-image and image coordinates clearly on scratch paper.
- Check if the problem provides the scale factor or if you need to calculate it first by dividing image length by pre-image length.
- Use the graphical line method as a visual check to confirm your algebraic formula results.
- Verify your answer by checking that all lines connecting corresponding vertices meet at the exact same coordinate.
 Fractional Scale Factor Problems in Geometric Dilation
 Applying Scale Factor in Architectural Design Plans
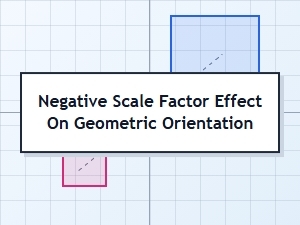 Navigating Geometric Orientation Under Negative Scale Factors
 Master Your Science Fair Model's Scale Factor
 Mastering Scale: an Interactive Architectural Model Guide
 Applying Scale Factor to Everyday Scenarios